Tuesday, June 07, 2016

Tuning I/O for Ethereum

At a high level, the I/O request goes from the running program to the operating system. Then from the operating system to the appropriate file system driver, then to the disk controller which writes to the disk.

It is usually important to match the I/O length (the amount of data being written) in each step of the process. Disks and the disk controllers typically write large stripes of data, such as 512KB. The file system may be set up with RAID, which can have stripes of 512KB or 1 MB. The operating system may default to a size of 16 KB (NTFS default has been 4 KB). To complicate this further, the operating system may implement file compression, which can pack more data into each I/O. And remember the filesystem may have logging, and may also frequently update inode access times which can cause contention.

It is typically difficult to change RAID settings after it has been implemented. RAID 5 will often be slow. It is typically impossible to change disk controller settings.

Therefore, let's concentrate on tuning a high I/O workload with commonly available settings in the filesystem and the program.

Increase the filesystem block size to a reasonably large value such as 64 KB. This is set when formatting a partition. While larger block sizes can lead to some wasted disk space, this is not typically a problem with modern large disks.

For tuning the program, if possible increase the program's (database or geth) cache size and match the logical I/O to the filesystem I/O size. For geth, it is possible to set the cache size with the --cache flag:
.\geth.exe --cache 512

The default geth cache is 16 MB, so 512 MB is a large increase. Set this lower than the amount of real RAM in the system, to avoid creating a swapping situation. Monitor this with Task Manager, using the following examples. Note 1.6 GB of real RAM is available to avoid swapping, which is a safe margin of error in case the program data increases.


Using the geth default of 16 MB, the maximum observed I/O was about 3 MB per second. Using geth's cache of 512 MB increased the maximum I/O to about 12 MB per second, a significant increase.


Wednesday, June 01, 2016

Move Microsoft Windows pagefile.sys

Moving the page file off the system disk can lead to reductions in disk I/O contention, which can lead to a quicker-feeling system. Systems which have small system disks can regain some disk space by moving the pagefile. These instructions for moving the pagefile to another disk are for Microsoft Windows 10.

Open a command prompt or Windows PowerShell.  To open PowerShell, press the Windows button and search for (start typing the words) "powershell". Click on PowerShell. (You may want to right-click and pin PowerShell for easy access in the future.)
With Windows PowerShell running, type> systeminfo
(PowerShell systeminfo displays the same information which is available through Control Panel, Administrative Tools, System Information.)
Note the "Windows Directory" and "Page File Location" are both on drive C.


This example computer is several years old, so drive C is relatively slow. The new drive is F, a three terabyte internal drive. The new drive has much better seek times and data throughput, so the system will likely feel more responsive if the pagefile is moved to drive F.

List the drives & volumes in powershell with > GET-WMIOBJECT win32_logicaldisk | format-table


Move the pagefile to the faster drive, F.

Show the virtual memory by opening Control Panel, System and Security, System, Advanced System Settings, Advanced tab, press Performance Settings... button, Advanced tab, press Change... button. Note the virtual memory is currently managed by the system and on drive C.


Create a pagefile on drive F with a Custom size by clicking on the new drive (F) and choosing Custom Size. Most users will choose a virtual memory size equal to real RAM or a multiple to the real RAM in the system. Press the Set button.
Select drive C and choose No Paging File and press the Set button. Press OK and the system will prompt for reboot. Reboot the system.


After reboot, verify the pagefile has moved correctly.


Using PowerShell to verify the pagefile, type > wmic pagefile list /format:list

AllocatedBaseSize=4096
CurrentUsage=0
Description=F:\pagefile.sys
InstallDate=20160512202132.760466-360
Name=F:\pagefile.sys
PeakUsage=1
Status=
TempPageFile=FALSE


Notice the PeakUsage is low, as it is a new pagefile.

Simpler PowerShell command, without formatting, is > wmic pagefile
 

Monday, May 02, 2016

Configure Windows Bitlocker

This guide demonstrates how to configure Microsoft Bitlocker disk encryption on an external drive using Microsoft Windows 10.

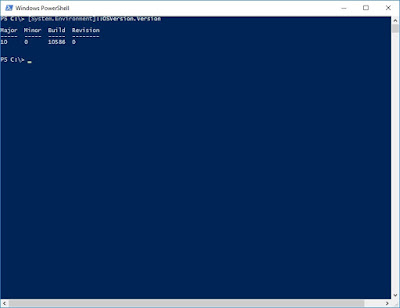
Determine which version of Microsoft Windows is in use. Press the Windows search button and type: powershell
Choose the PowerShell application.
In PowerShell type: Type: [System.Environment]::OSVersion.Version


Open Control Panel: right-click on Windows button, choose Control Panel

In Control Panel upper-right search box, type: group policy
Choose: Edit group policy
 

For those who watch the Windows error log, the BitLocker Event IDs are described here. The Event IDs are 24577 - 24621.

In the Local Group Policy Editor, navigate to Navigate to: Computer Configuration\Administrative Templates\Windows Components\BitLocker Drive Encryption

To change the default drive encryption of 128-bit to 256-bit, edit the entry: Choose drive encryption method and cipher strength


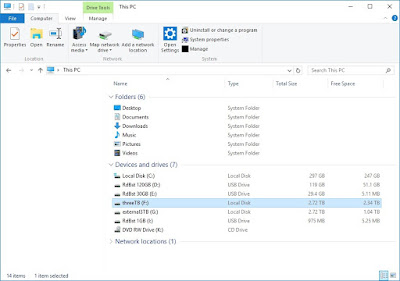
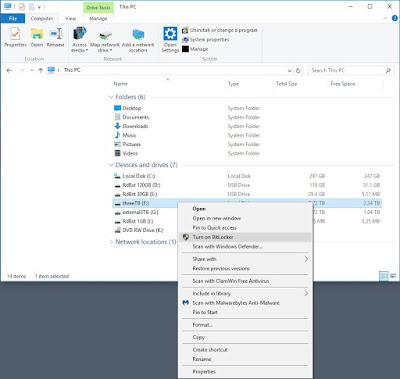
To turn on drive encryption, go to Windows Explorer and right-click on the drive. Select Turn on BitLocker
The drive will be set up for encryption.


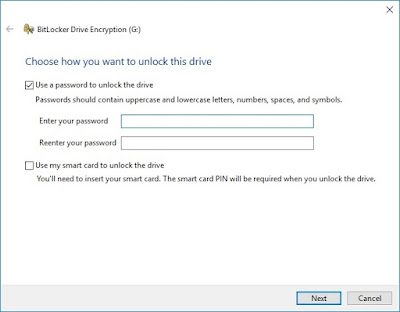
Choose a password.


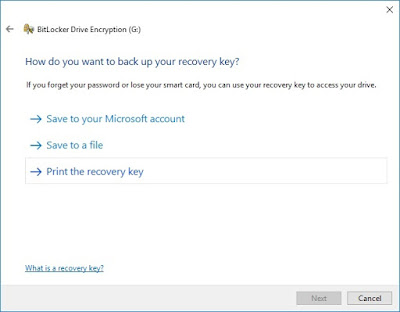
It may be good to print a recovery key. Place the printed key offsite in a secure location.


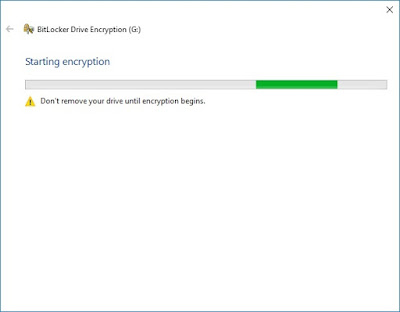
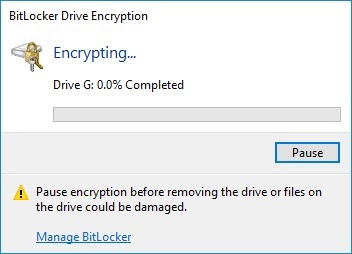
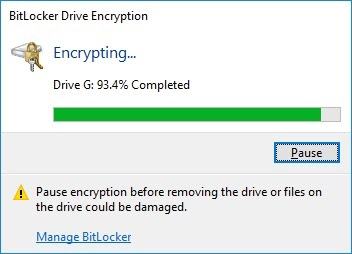
The process of encrypting the drive will begin. Existing data is maintained, so the encryption process may take a day or more.


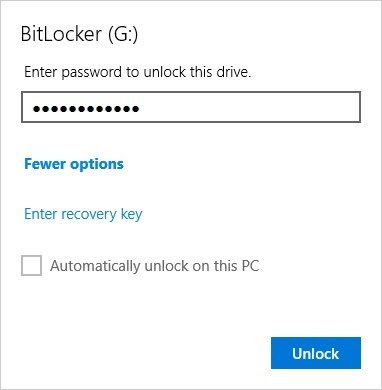
After the drive is encrypted, test unlocking the drive. This is a good time to restart the PC, then go to Windows Explorer and note the yellow icon on the drive letter. Right-click the drive and choose: Unlock Drive...


Enter the drive password.
 

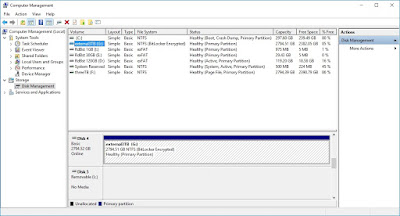
This shows Computer Management with the drive designated as "BitLocker Encrypted".


Wednesday, April 27, 2016

How to mine Ethereum on Microsoft Windows 64 bit - benchmark the miner and mine

These instructions have been tested on Microsoft Windows 10 64 bit, 4GB RAM, with an ATI video card.


In a prior post, the geth software which communicates with the Ethereum network was downloaded and installed. An account address was created and the current block chain was downloaded. The mining software was downloaded and installed.

In this post, we will test the mining software by benchmarking both CPU mining and GPU mining.


Two command prompt windows will be opened, one for geth and one for ethminer.


Open a cmd prompt.

Go to the geth software directory.

Start geth by typing: .\geth --rpc

The block chain will be synchronized, which should take a few minutes to download the latest blocks.

Open another cmd prompt.

Go to the ethminer directory: cd %PROGRAMFILES%\Ethereum <release number>\Release

Ethminer communicates with geth, so ensure it is still running in the other cmd window. The first time ethminer is run, it will create a "DAG" file. The DAG creation process conveniently shows percent complete.

Start ethminer to create the DAG file.
C:\Program Files\Ethereum 0.9.41\Release>.\ethminer
miner  13:13:26|main  Getting work package...
JSON-RPC problem. Probably couldn't connect. Retrying in 1...
miner  13:13:28|main  Getting work package...
miner  13:13:28|main  Grabbing DAG for #0016beddΓǪ
DAG  13:13:55|main  Generating DAG file. Progress: 0 %
Creating DAG. 0% done...DAG  13:14:08|main  Generating DAG file. Progress: 1 %
Creating DAG. 1% done...


Start ethminer in benchmark mode (-M) and benchmark CPU mining.
Benchmarking on platform: CPU
Preparing DAG...
Warming up...
Trial 1... 377068
Trial 2... 381018
Trial 3... 385818
Trial 4... 386728
Trial 5... 388705
min/mean/max: 377068/383867/388705 H/s
inner mean: 384521 H/s
Phoning home to find world ranking...


Start ethminer in benchmark mode (-M) and benchmark GPU (-G) mining.
.\ethminer -G -M

If the miner does not start, there are some troubleshooting steps. A common failure message is "No GPU device with sufficient memory was found. Can't GPU mine. Remove the -G argument"

List the GPU devices: .\ethminer --list-devices

Listing OpenCL devices.
FORMAT: [deviceID] deviceName
[0] Bonaire
        CL_DEVICE_TYPE: GPU
        CL_DEVICE_GLOBAL_MEM_SIZE: 2147483648
        CL_DEVICE_MAX_MEM_ALLOC_SIZE: 1409286144
        CL_DEVICE_MAX_WORK_GROUP_SIZE: 256


Try to specify the GPU: .\ethminer -G -M --opencl-device 0

Try to specify a different OpenCL platform implementation: .\ethminer -G --opencl-platform 1 -M

Found suitable OpenCL device [Bonaire] with 2147483648 bytes of GPU memory
Benchmarking on platform: GPU
Preparing DAG...
  i  22:35:42|gpumineWra0r m iwnogr kuLpo.o.p.
0 #00000000… #00000000…
  i  22:35:42|gpuminer0  Initialising miner...
Using platform: AMD Accelerated Parallel Processing
Using device: Bonaire(OpenCL 2.0 AMD-APP (2004.6))
Printing program log

Creating one big buffer for the DAG
Loading single big chunk kernels
Mapping one big chunk.
Creating buffer for header.
Creating mining buffer 0
Creating mining buffer 1
Trial 1... 4801172
Trial 2... 4886838
Trial 3... 4972448
Trial 4... 4886838
Trial 5... 4974103
min/mean/max: 4801172/4904279/4974103 H/s
inner mean: 4944463 H/s
Phoning home to find world ranking...


Start mining with whichever flags work on your platform:
.\ethminer -G
.\ethminer -G --opencl-platform 1


Monday, April 25, 2016

How to mine Ethereum on Microsoft Windows 64 bit - ethminer

These instructions have been tested on Microsoft Windows 10 64 bit, 4GB RAM, with an ATI video card.

In a prior post, the geth software which communicates with the Ethereum network, was downloaded and installed. An account address was created and the current block chain was downloaded.

In this post, the block miner ethminer will be downloaded and installed.


Download the latest Ethereum miner at https://build.ethdev.com/builds/Windows%20C%2B%2B%20develop%20branch/Ethereum-win64-latest.exe

Unzip the files. By default, the files will go to the %PROGRAMFILES%\Ethereum <release number>


The Ethereum miner has been downloaded and installed.

The next step is to test the miner.