Showing posts with label Microsoft Windows 10. Show all posts

Monday, July 26, 2021

Microsoft Windows Core Memory Integrity

Microsoft Windows 10 memory integrity, or "core isolation", uses hardware virtualization to protect memory used by Windows system processes from manipulation (often by malware). This is generally a good security feature to enable, though it may interfere with older device drivers. This option is not automatically turned on by some vendors, so you will need to check this yourself.

Read about Microsoft's Core Isolation.

A recently purchased MS Windows 10 chromebook from Dell had this option turned off, so Core Integrity should be checked even on factory-delivered machines. The Dell chromebook was runing the Windows version known as "Windows 10 Home in S mode". 

For any Windows 10, check if Windows is running with virtualization by looking in Task Manager. Press Start button, and type: task manager
Choose the Task Manager app. 

In Task Manager, click the Performance tab, then CPU. Look in the lower right for Virtualization. In the following picture of Task Manager, hardware virtualization is enabled. Alternatively, open a command prompt, run systeminfo, and look for the Hyper-V line.


If Virtualization is not enabled, reboot the machine and press a key for BIOS setup (often a function key or the DEL key). In the BIOS setup utility, look for virtualization or "VT" and turn it on. Save the BIOS settings and restart the machine. Here are a couple different BIOS pictures:


After rebooting and starting Windows, go to the Settings app (press the Start button, press the gear icon). In the Settings app, type: core isolation

Pressing Core Isolation will open Windows Security, Device Security, and Core Isolation Details. 


If you do not see Memory Integrity on the Core Isolation page, you will need to restart the computer and enter the BIOS settings to turn on virtualization options. 

If Memory Integrity is already turned on, your machine is configured to use core memory integrity and your are done. 

If Memory Integrity is off, try to turn it on. In some cases it will turn on easily. In other cases it will want a reboot. In more challenging cases it will find incompatible drivers and you can decide how to correct each driver.


For the following procedures, you will need to be the computer Administrator.

It may take a restart to fully set Core Isolation to on. If it finds incompatible drivers, press the Review link.


Some incompatible drivers must be completely removed. In one case, I encountered an incompatible Realtek sound driver that I removed, rebooted, turned on Memory Integrity, and then was able to reinstall the same sound driver while successfully keeping Memory Integrity turned on.


In this example, the Realtek sound driver and the ViMicro web cam drivers are incompatible. To remove these drivers, look in device manager and uninstall the drivers. As computer Administrator, press Start button and type: device manager
Look around in Device Manager for the yellow flags, and try to update or uninstall the device and delete the driver software. In this case, the old driver "oem3.inf" could not be removed through Device Manager.

The driver was able to be removed from the command line as Administrator: pnputil /delete-driver oem3.inf


If a driver will not uninstall, you can also remove it by hand (or rename it). Look in folder C:\Windows\System32\drivers.


When done resolving incompatible drivers, the Memory Integrity setting in Windows Security Center should look like this.


When finished, you may want to create a restore point. Press the Start button and type: restore point
Configure and Create the new restore point. 

You should now check for corrupt Windows files. This will run the Windows Module Installer and verify and correct the Windows software.


Thursday, February 11, 2021

MS Windows 10 Border Width

Microsoft made super-skinny border widths on Windows 10. While there has been a couple years for this design mistake to be corrected, it appears this will not be changing in the pending release of Window 11.
It is well past a reasonable amount of time for Microsoft to fix the super-skinny window borders.

The skinny window borders make it challenging to place and align windows. It also makes it challenging for older or disabled persons to grab the side of the window.

The straight-forward method to have fat window borders is to turn on the high visibility theme. This will produce drastic visual changes, make websites look different than what you may expect, and remove backgrounds such as desktop color or picture. You may want to try this change and then decide if fat window borders are worth the other visual changes in the theme.


Standard MS Windows 10 borders look like this.


Press the Start button and type: themes

Choose the app for "Themes and related settings".

In the Settings window, scroll down and click on "High contrast settings".


Turn on the high contrast slider, then choose theme "High Contrast White" in the drop down list box.


While visually jarring at first, the High Contrast White theme does increase the window border width.


Saturday, March 14, 2020

Disable Windows 10 Netbios and SMB

On Microsoft Windows 10, SMB 1 should already be disabled. To enhance security, you may want to also disable SMB 1 and 2 and NetBIOS.

Open PowerShell as Administrator by pressing the Start button, typing powershell, and pressing Run As Administrator:


Read the Microsoft post about how to disable SMB

In PowerShell, get the setting and disable it with:
Get-SmbServerConfiguration | Select EnableSMB2Protocol
Set-SmbServerConfiguration -EnableSMB2Protocol $false


Disable SMB v1 in PowerShell with:
Disable-WindowsOptionalFeature -Online -FeatureName smb1protocol

If you see an error of "Access is denied", ensure you run PowerShell as Administrator.


To disable NetBIOS, in Control Panel go to Advanced TCP/IP Settings and press the radio button:


Saturday, February 22, 2020

Uninstall Windows 10 Apps

Microsoft is aggressively pushing some unwanted applications during Windows 10 upgrades. Some of the applications may be uninstalled in Windows Settings --> Apps & features. Many can not be removed or uninstalled there.

It is possible to use the command line to uninstall some of these unwanted applications.

Press the Start button and type: windows powershell
Click on "Run as Administrator" to open the Power Shell.


To uninstall "Your Phone", in Power Shell type: Get-AppxPackage Microsoft.YourPhone -AllUsers | Remove-AppxPackage


To remove xbox, type: get-appxpackage -allusers *xboxapp* | Remove-AppxPackage
Three more lines to remove xbox are: get-appxprovisionedpackage –online | where-object {$_.packagename –like “*xboxapp*”} | remove-appxprovisionedpackage –online
And: get-appxpackage -allusers *xboxapp* | Remove-AppxPackage
And: get-appxprovisionedpackage –online | where-object {$_.packagename –like “*xboxapp*”} | remove-appxprovisionedpackage –online 
To remove the Xbox Game Bar application, type: get-appxpackage -allusers *xbox* | Remove-AppxPackage

To remove 3D Builder type: Get-AppxPackage *3dbuilder* | Remove-AppxPackage 
Also remove the 3D Viewer: Get-AppxPackage Microsoft.Microsoft3DViewer | Remove-AppxPackage

To remove the Camera application type: Get-AppxPackage *windowscamera* | Remove-AppxPackage

To remove Maps type: Get-AppxPackage *windowsmaps* | Remove-AppxPackage

To remove Microsoft's People app, type: Get-AppxPackage *people* | Remove-AppxPackage


If you want to re-install the applications, open the Windows Store from the Start menu and install the applications.

After the applications are removed, you may want to create a restore point. Press the Start button and type: restore point. Then Configure and Create a restore point.

Sunday, February 17, 2019

Microsoft Windows Can't See Other Computers

While troubleshooting a computer which could not see other devices on the network, I found that the "network discovery" setting would not turn on. This is on Microsoft Windows 10.

Press the Start button, and then type: control panel
Open the Control Panel and go to: Control Panel\Network and Internet\Network and Sharing Center

Choose "Change advanced sharing settings"


Choose "Turn on network discovery" and then press "Save changes".


You will then be taken back to the prior window. Go back in to "Change advanced sharing settings" and confirm the network discovery is actually turned on. If it is not turned on, you should check which services are running.
Press the Start button and then type: services
In the Services application, look for "SSDP Discovery". If it is not running, right-click and start it.


Now when you start File Explorer and go to Network, you should see devices on the network. You should at least be able to see your router. If you can see the router but not other devices such as a NAS, start troubleshooting by trying to ping the device by IP address.

Wednesday, April 25, 2018

Security Software on Microsoft Windows 10

These instructions should also work on Microsoft Windows 7 and 8.1.

For home use, I run the following free security products on Microsoft Windows 10:
Microsoft's Enhanced Mitigation Experience Toolkit (EMET) does not work on Windows 10. Users are directed to Microsoft's Windows Defender Exploit Guard.

Sunday, February 25, 2018

Blocks Ads With Windows 10 Hosts File

Some web pages, such as Microsoft's Hotmail, often bring in ads from other domains which slow down use of the online email service. To speed up web browsing, either block the domains with your router, with a custom DNS, or on your PC. If using Microsoft Windows 10, add the domains to the hosts file.

Press Start button and type "notepad":

Right-click to run Notepad as administrator:


In the Notepad application, open the file C:\Windows\System32\drivers\etc\hosts (or %WINDIR%\System32\drivers\etc)
At the bottom of the hosts file, enter lines to avoid the problem domains. Note the typical convention of the first identation is a "tab", and the spaces between the number and the domain name are spaces. The hash "#" indicates a comment.
#    127.0.0.1       localhost
    127.0.0.1       cdn-ssl.vidible.tv
    127.0.0.1       acds.prod.vidible.tv
    127.0.0.1       trk.vidible.tv
    127.0.0.1       dtm.advertising.com
    127.0.0.1       ad.lkqd.net
    127.0.0.1       t.lkqd.net
    127.0.0.1       p.vj-vid.com
    127.0.0.1       to.vj-vid.com
    127.0.0.1       px.moatads.com
    127.0.0.1       z.moatads.com
    127.0.0.1       vpaid.springserve.com
    127.0.0.1       tracker.departapp.com
    127.0.0.1       a.imprvdosrv.com
    127.0.0.1       s59.imprvdosrv.com
    127.0.0.1       cdn.altitude-arena.com
    127.0.0.1       static.shoofle.tv

In the Notepad application, click File -> Save

Unfortunately, the Microsoft Windows hosts file does not support wildcards. You are required to add entries for subdomains. Alternatively, you can run your own DNS service and use dnsmasq, or use a subscription DNS service which provides wildcards.

Monday, June 27, 2016

SkypeHost.exe on Windows 10

Anyone who does not use Skype and who is looking through Task Manager may be frustrated to observe a task named SkypeHost.exe. While it may have "Suspended" status, some users would like to completely remove the task while not affecting Skype for other users on the PC.


SkypeHost.exe will restart if it is killed through "End task" in the Task Manager. The following instructions will remove the task, while allowing Skype to continue to function for other users of the PC.

The process is to open the Skype application and log in.  Then choose "Options" and uncheck "Start Skype which I start Windows" and "Sign me in when Skype starts".


 The process will end, and it will not restart the next time you log in.


Tuesday, June 07, 2016

Tuning I/O for Ethereum

At a high level, the I/O request goes from the running program to the operating system. Then from the operating system to the appropriate file system driver, then to the disk controller which writes to the disk.

It is usually important to match the I/O length (the amount of data being written) in each step of the process. Disks and the disk controllers typically write large stripes of data, such as 512KB. The file system may be set up with RAID, which can have stripes of 512KB or 1 MB. The operating system may default to a size of 16 KB (NTFS default has been 4 KB). To complicate this further, the operating system may implement file compression, which can pack more data into each I/O. And remember the filesystem may have logging, and may also frequently update inode access times which can cause contention.

It is typically difficult to change RAID settings after it has been implemented. RAID 5 will often be slow. It is typically impossible to change disk controller settings.

Therefore, let's concentrate on tuning a high I/O workload with commonly available settings in the filesystem and the program.

Increase the filesystem block size to a reasonably large value such as 64 KB. This is set when formatting a partition. While larger block sizes can lead to some wasted disk space, this is not typically a problem with modern large disks.

For tuning the program, if possible increase the program's (database or geth) cache size and match the logical I/O to the filesystem I/O size. For geth, it is possible to set the cache size with the --cache flag:
.\geth.exe --cache 512

The default geth cache is 16 MB, so 512 MB is a large increase. Set this lower than the amount of real RAM in the system, to avoid creating a swapping situation. Monitor this with Task Manager, using the following examples. Note 1.6 GB of real RAM is available to avoid swapping, which is a safe margin of error in case the program data increases.


Using the geth default of 16 MB, the maximum observed I/O was about 3 MB per second. Using geth's cache of 512 MB increased the maximum I/O to about 12 MB per second, a significant increase.


Wednesday, June 01, 2016

Move Microsoft Windows pagefile.sys

Moving the page file off the system disk can lead to reductions in disk I/O contention, which can lead to a quicker-feeling system. Systems which have small system disks can regain some disk space by moving the pagefile. These instructions for moving the pagefile to another disk are for Microsoft Windows 10.

Open a command prompt or Windows PowerShell.  To open PowerShell, press the Windows button and search for (start typing the words) "powershell". Click on PowerShell. (You may want to right-click and pin PowerShell for easy access in the future.)
With Windows PowerShell running, type> systeminfo
(PowerShell systeminfo displays the same information which is available through Control Panel, Administrative Tools, System Information.)
Note the "Windows Directory" and "Page File Location" are both on drive C.


This example computer is several years old, so drive C is relatively slow. The new drive is F, a three terabyte internal drive. The new drive has much better seek times and data throughput, so the system will likely feel more responsive if the pagefile is moved to drive F.

List the drives & volumes in powershell with > GET-WMIOBJECT win32_logicaldisk | format-table


Move the pagefile to the faster drive, F.

Show the virtual memory by opening Control Panel, System and Security, System, Advanced System Settings, Advanced tab, press Performance Settings... button, Advanced tab, press Change... button. Note the virtual memory is currently managed by the system and on drive C.


Create a pagefile on drive F with a Custom size by clicking on the new drive (F) and choosing Custom Size. Most users will choose a virtual memory size equal to real RAM or a multiple to the real RAM in the system. Press the Set button.
Select drive C and choose No Paging File and press the Set button. Press OK and the system will prompt for reboot. Reboot the system.


After reboot, verify the pagefile has moved correctly.


Using PowerShell to verify the pagefile, type > wmic pagefile list /format:list

AllocatedBaseSize=4096
CurrentUsage=0
Description=F:\pagefile.sys
InstallDate=20160512202132.760466-360
Name=F:\pagefile.sys
PeakUsage=1
Status=
TempPageFile=FALSE


Notice the PeakUsage is low, as it is a new pagefile.

Simpler PowerShell command, without formatting, is > wmic pagefile
 

Monday, May 02, 2016

Configure Windows Bitlocker

This guide demonstrates how to configure Microsoft Bitlocker disk encryption on an external drive using Microsoft Windows 10.

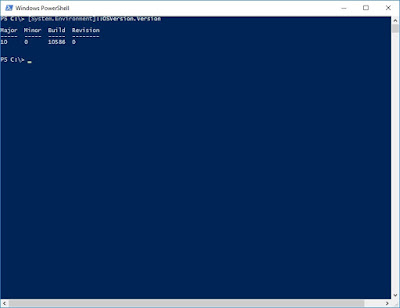
Determine which version of Microsoft Windows is in use. Press the Windows search button and type: powershell
Choose the PowerShell application.
In PowerShell type: Type: [System.Environment]::OSVersion.Version


Open Control Panel: right-click on Windows button, choose Control Panel

In Control Panel upper-right search box, type: group policy
Choose: Edit group policy
 

For those who watch the Windows error log, the BitLocker Event IDs are described here. The Event IDs are 24577 - 24621.

In the Local Group Policy Editor, navigate to Navigate to: Computer Configuration\Administrative Templates\Windows Components\BitLocker Drive Encryption

To change the default drive encryption of 128-bit to 256-bit, edit the entry: Choose drive encryption method and cipher strength


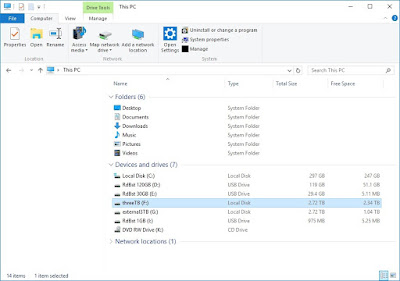
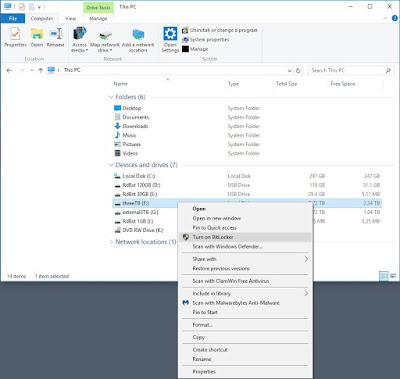
To turn on drive encryption, go to Windows Explorer and right-click on the drive. Select Turn on BitLocker
The drive will be set up for encryption.


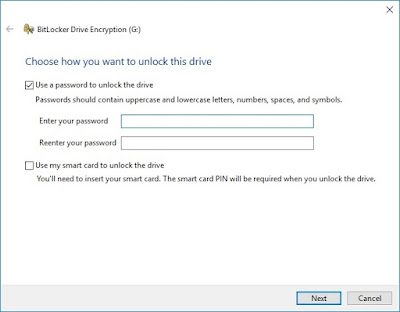
Choose a password.


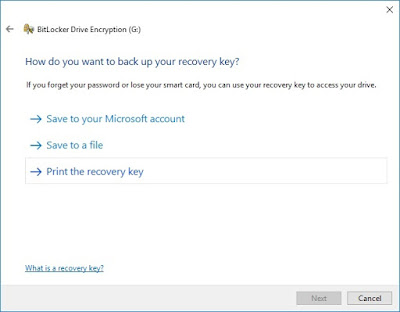
It may be good to print a recovery key. Place the printed key offsite in a secure location.


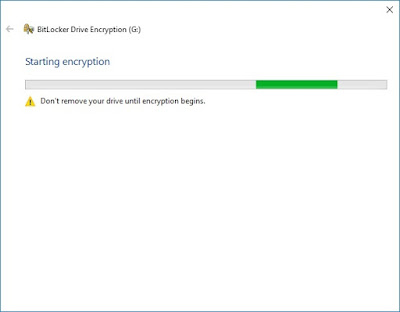
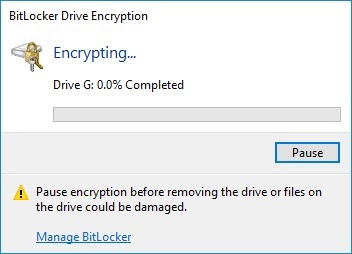
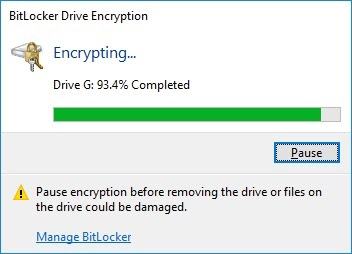
The process of encrypting the drive will begin. Existing data is maintained, so the encryption process may take a day or more.


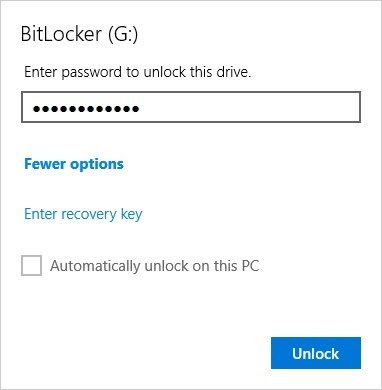
After the drive is encrypted, test unlocking the drive. This is a good time to restart the PC, then go to Windows Explorer and note the yellow icon on the drive letter. Right-click the drive and choose: Unlock Drive...


Enter the drive password.
 

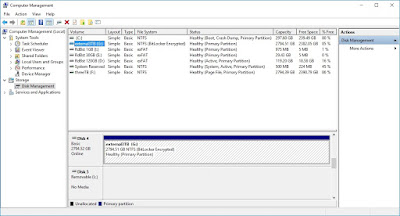
This shows Computer Management with the drive designated as "BitLocker Encrypted".